Tag: Wellness Gear

  • Red Light Therapy Timing: When to Use Panels for Sleep, Skin, and Recovery

    Red Light Therapy Timing: When to Use Panels for Sleep, Skin, and Recovery

    Affiliate disclosure: As an Amazon Associate, Hot Cold Recovery earns from qualifying purchases. Product recommendations are our honest opinion based on published specs, warranty terms, and available user reports. Prices reflect Amazon US at time of publication and are subject to change. Full disclosure.

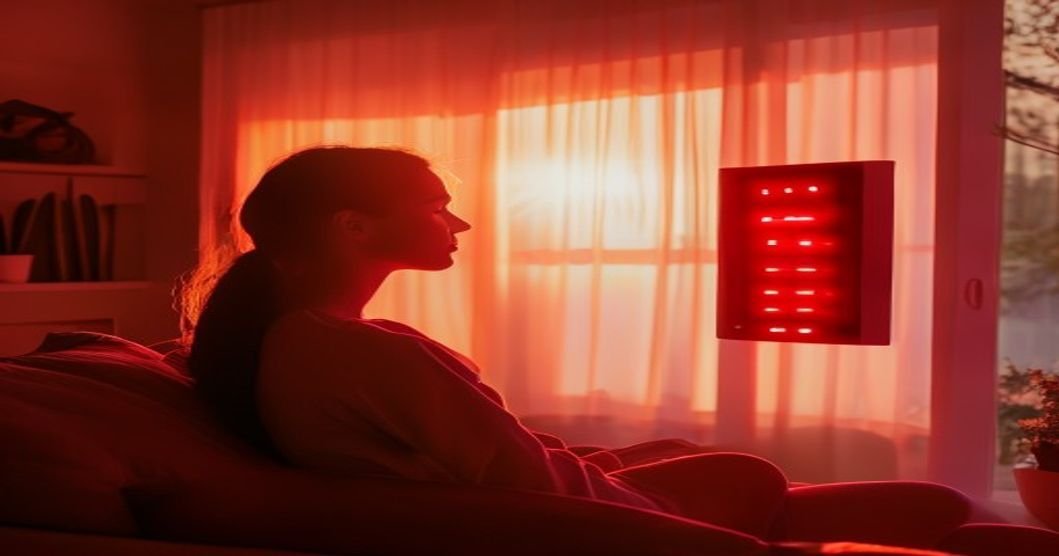
    Most red light therapy guides tell you what wavelengths to buy. Very few tell you WHEN to use them. And timing turns out to matter as much as the panel specs – morning red light does different things than evening red light, and using RLT at the wrong time can actively work against what you’re trying to achieve.

    This is the timing guide for red light therapy at home.


    What time-of-day changes about red light therapy

    Morning (6-10 AM)

    Red light in the morning supports circadian rhythm reset – especially useful for shift workers, jet lag recovery, and people with delayed sleep phase (natural night owls). The 660nm red wavelength signals the eye’s circadian receptors similar to sunrise. Morning RLT can improve daytime alertness and evening sleep quality.

    Midday (11 AM – 2 PM)

    Best time for skin-focused sessions. Metabolism is at baseline, cortisol is stable, and you can do 20-30 min sessions without energy interference. Ideal for anti-aging and collagen production goals.

    Late afternoon (3-6 PM)

    Best window for muscle recovery sessions if you trained earlier. Post-workout RLT (2-4 hours after) shows the strongest research support for reducing DOMS (delayed onset muscle soreness).

    Evening (7-9 PM)

    Can support wind-down for some people. The 830nm near-infrared component activates mitochondria in a way that some users report as calming. BUT – 660nm red visible light can suppress melatonin similar to blue light if the panel is bright enough. Use dimmer settings or short sessions in the evening.

    Pre-bed (within 90 min of sleep)

    Generally avoid full-power sessions. If you use RLT this close to bed, keep sessions under 10 minutes and use only near-infrared (invisible to the eye, no melatonin suppression risk).


    Protocols by goal

    Skin health (anti-aging, collagen)

    • Timing: midday, ideally daily
    • Session: 10-20 min on face at 6-8 inches
    • Wavelengths: 630nm + 660nm
    • Frequency: 5 sessions/week for 12 weeks minimum

    Muscle recovery

    • Timing: 2-4 hours after training
    • Session: 10-15 min on treated muscle at 6 inches
    • Wavelengths: 810nm + 850nm (near-infrared penetrates deeper)
    • Frequency: after each training session

    Circadian rhythm reset (shift work, jet lag)

    • Timing: within 30 min of waking
    • Session: 10-15 min at 12-18 inches
    • Wavelengths: 660nm dominant
    • Frequency: daily for 2 weeks, then as needed

    Joint pain relief

    • Timing: 2x/day – morning and evening
    • Session: 15-20 min on affected joint at 4 inches
    • Wavelengths: 810nm + 850nm
    • Frequency: daily until pain reduces, then maintenance 3x/week

    Gear that makes timing easier

    Red Light Panel with Built-In Timer

    Panels with programmable timers make consistent session length trivial. Set 15 min, walk away, shuts off automatically. Panels without timers require phone-timer workaround.

    Check current price on Amazon →

    Adjustable Panel Stand (Positioning)

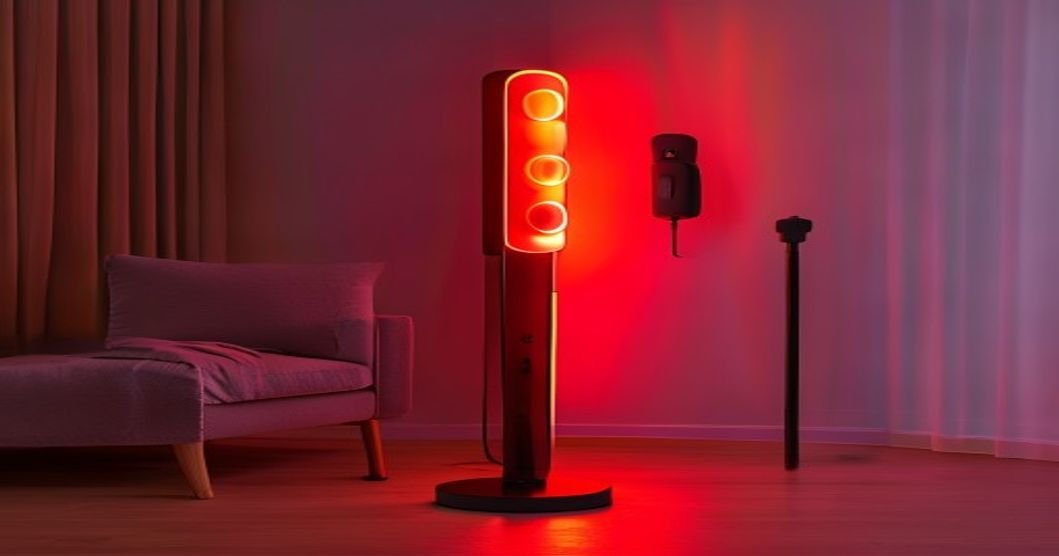
    The 6-inch distance recommendation matters. An adjustable stand lets you set panel height for face, torso, or leg sessions without holding it. Under .

    Check current price on Amazon →

    Blue-Light Blocking Glasses (Evening RLT)

    If you use RLT in the evening, blue-light-blocking glasses reduce the melatonin-suppression risk from visible red wavelengths. Amber lens filters the specific frequencies.

    Check current price on Amazon →

    Sunrise Alarm Clock (Morning RLT Companion)

    Wake-up alarm that gradually brightens to 660nm before your RLT session amplifies the circadian reset effect. Best paired with morning RLT protocol.

    Check current price on Amazon →

    Recovery Stack Tracker (Log Your Sessions)

    Simple notebook or app to log session times, durations, and effects. Necessary if you want to know what protocol is actually working for YOU vs generic recommendations.

    Check current price on Amazon →

    Red Light Watch/Wearable (Portable Option)

    Wrist-worn red light devices for on-the-go dosing. Convenient but much lower irradiance than a panel. Best used as SUPPLEMENT to panel sessions, not replacement.

    Check current price on Amazon →


    Common timing mistakes

    • Using RLT within 30 min of bed with full-power panels – can delay sleep by 15-30 min for melatonin-sensitive individuals.
    • Doing recovery sessions BEFORE workouts – RLT before training may slightly REDUCE workout adaptation. Use it after.
    • Inconsistent timing week-to-week – benefits compound with consistency. 5 sessions/week at random times underperforms 3 sessions/week at the same time.
    • Skipping the eye protection – direct panel view can cause discomfort. Not dangerous at typical distances but not comfortable.

    The honest bottom line

    For most home users, midday or late-afternoon sessions are the pragmatic default. Broadest research support, lowest risk of interfering with sleep, and most compatible with typical daily schedules.

    If you’re using RLT for a specific goal (circadian reset, sleep improvement, targeted recovery), timing matters more than panel specs. A modest panel used at the right time beats a premium panel used at the wrong time.

    Give any protocol 4-6 weeks before deciding it works or doesn’t. Red light effects are cumulative, not immediate.


    Not medical advice: Hot Cold Recovery publishes educational content about home wellness gear. The information here is not a substitute for professional medical advice, diagnosis, or treatment. Always consult a qualified healthcare provider before starting any new wellness practice, especially if you have a cardiovascular condition, are pregnant, or take medication. Home wellness devices are not FDA-cleared to treat, cure, or prevent any specific disease.
  • Cold Plunge Chiller Ratings Explained: BTU vs HP vs Real Recovery Times

    Cold Plunge Chiller Ratings Explained: BTU vs HP vs Real Recovery Times

    Affiliate disclosure: As an Amazon Associate, Hot Cold Recovery earns from qualifying purchases. Product recommendations are our honest opinion based on published specs, warranty terms, and available user reports. Prices reflect Amazon US at time of publication and are subject to change. Full disclosure.

    Cold plunge chiller specifications are a mess of marketing numbers, engineering units, and cross-brand inconsistency. “1/3 HP chiller” from one brand cools half the water of “1/3 HP chiller” from another brand. “60-minute recovery time” measured at what starting temp, in what ambient, with what insulation? Nobody tells you.

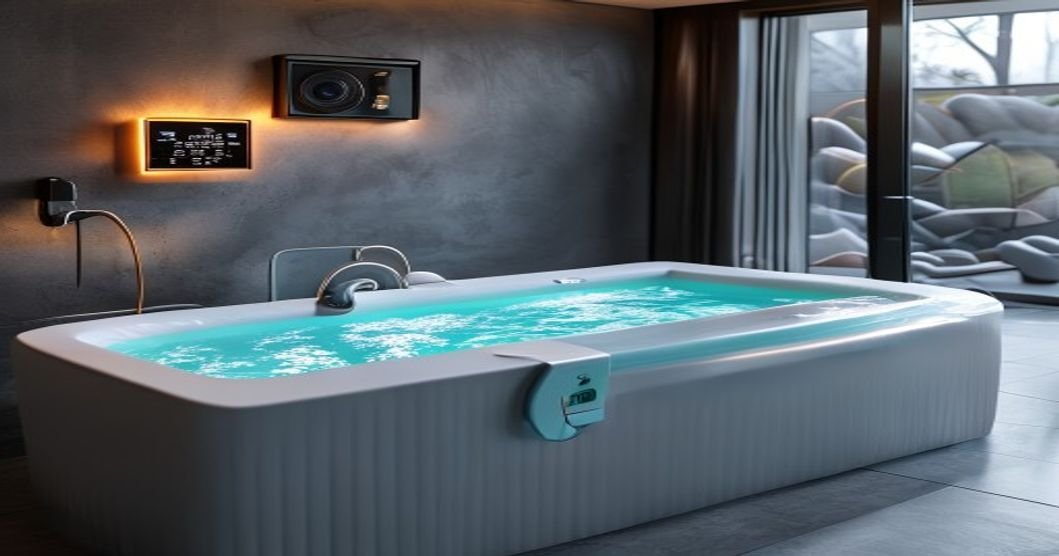
    This guide translates chiller specs into what actually matters: how long it takes to bring your water back to plunge temperature after a session, and how much electricity that costs.


    The 5 numbers that actually matter

    1. Cooling capacity (BTU/hr or watts): the honest measure. Ignore HP – it varies by chiller design. BTU/hr directly translates to “how much heat can this remove per hour.”
    2. Tub volume (gallons): larger tub = more water = more energy to cool. Small tubs (60 gal) recover fast even with weak chillers. Large tubs (150+ gal) need serious chillers.
    3. Starting temp vs target temp: going from 70F to 40F takes 4x longer than going from 50F to 40F. Marketing claims almost always measure the easy delta.
    4. Ambient air temp: chiller efficiency drops sharply above 80F room temp. Basement install (60-70F) gives you 20% better recovery times than garage in summer.
    5. Insulation R-value: the tub itself and the cover. Poor insulation = chiller runs constantly. Good insulation = chiller cycles briefly.

    Real recovery times by chiller size

    Assuming 80-gallon tub, well-insulated with cover, ambient 68F, starting water 60F, target 40F:

    • 1/6 HP (2,400 BTU/hr): 4-6 hours to reach target. Barely holds temp during a session.
    • 1/3 HP (4,000 BTU/hr): 2-3 hours to reach target. Good for daily solo use with cover on between sessions.
    • 1/2 HP (6,000 BTU/hr): 60-90 minutes. This is the “just works” tier for household use.
    • 3/4 HP (9,000 BTU/hr): 30-45 minutes. Good for households where multiple people plunge daily.
    • 1 HP (12,000 BTU/hr): 20-30 minutes. Overkill for solo use, right for commercial or multi-user setups.

    Chillers that ship as standalone units

    Standalone chillers connect to any tub via input/output ports. Useful if you have a stock tank, hot tub conversion, or want to upgrade an existing plunge.

    Best Budget Standalone Chiller (1/4 HP)

    Aquarium and hydroponic chillers in the 1/4-1/3 HP range work fine for cold plunge conversion. Under $700, needs external pump. Best for tubs under 80 gallons.

    Check current price on Amazon →

    Best Value Standalone (1/2 HP)

    The most-recommended standalone tier. 1/2 HP with LED display, temperature control, and often includes a pump. Works with tubs up to 120 gallons.

    Check current price on Amazon →

    Best Premium Standalone (3/4 to 1 HP)

    Commercial-grade chillers with faster recovery, quieter operation, and 5+ year warranties. -2500. Overkill for solo daily use but worth it if multiple people plunge or if you want fast turnaround.

    Check current price on Amazon →

    Best Insulated Cover (Chiller Runtime Reducer)

    A good insulated cover cuts your chiller runtime by 40-60%. This is the single most valuable accessory. Custom-fit covers exist for common tub sizes.

    Check current price on Amazon →

    Best Water Filter Add-On

    20-micron sediment filter, then a 5-micron polishing filter. Keeps water clear between water changes. Extends time between drain-and-refills from every 2 weeks to every 2 months.

    Check current price on Amazon →

    Best Ozone Sanitizer Add-On

    For water sanitization without chlorine or bromine (which damage skin). -400 add-on, plugs inline with your chiller. Extends water life significantly.

    Check current price on Amazon →


    How much does a chiller cost to run?

    Rough electric cost math for daily use, at .15/kWh:

    • 1/3 HP running 4 hrs/day (poor insulation): /month
    • 1/3 HP running 1.5 hrs/day (good insulation + cover): /month
    • 1/2 HP running 2 hrs/day: /month
    • 1 HP running 1 hr/day: /month

    The insulation matters more than the chiller size for monthly cost.


    The honest bottom line

    For most home users with an 80-100 gallon tub, a 1/2 HP chiller with good insulation and cover is the pragmatic choice. Fast enough recovery for daily use, cheap enough to run monthly.

    Don’t overspend on 1 HP if you’re the only one using it. Do spend on a good insulated cover regardless of chiller size.

    Marketing claims are unreliable. When comparing chillers, ask for BTU/hr (or watts) – that’s the honest number.

  • Sun Home vs Sunlighten: The Honest Premium Infrared Sauna Comparison

    Sun Home vs Sunlighten: The Honest Premium Infrared Sauna Comparison

    Affiliate disclosure: As an Amazon Associate, Hot Cold Recovery earns from qualifying purchases. Product recommendations are our honest opinion based on published specs, warranty terms, and available user reports. Prices reflect Amazon US at time of publication and are subject to change. Full disclosure.

    If you are shopping premium infrared saunas at the $3,000+ tier, you have essentially two brand fights to consider: Sun Home Saunas and Sunlighten. Both are established, both have real fans, both have real complaints. Which one you actually pick depends less on the marketing and more on what you personally value in a $3,500-$7,000 purchase.

    This is the honest side-by-side comparison from the perspective of someone actually shopping the decision.


    The 60-second answer

    Pick Sun Home if: you want the best specs-per-dollar in the premium tier, you like buying direct-to-consumer, and you value newer engineering.

    Pick Sunlighten if: you value 20+ years of brand history, want the widest warranty coverage, and don’t mind paying 20-30% more for the brand established-ness.


    Head-to-head on the specs that actually matter

    Wood quality

    Both use certified Canadian hemlock or Western red cedar. Slight edge to Sunlighten for cedar consistency across model tiers. Sun Home cedar upgrade is optional and adds significant cost.

    Heater technology

    Sun Home uses proprietary carbon panel heaters. Sunlighten uses their own carbon panel technology branded as “SoloCarbon” (Sunlighten trademark). Similar output. Both publish independent EMF test data (both are low – well under 3 mG).

    Full-spectrum options

    Sunlighten pioneered full-spectrum (adding near-infrared to standard far-infrared). Their “Signature” and “Solo Carbon” models are the industry reference. Sun Home Signature model matches Sunlighten’s approach and undercuts on price by ~$800-$1,500.

    Warranty

    Sunlighten: lifetime warranty on the wood structure, 7 years on heaters (industry-leading).

    Sun Home: lifetime on wood, 5 years on heaters (very good, but shorter).

    Control panel and software

    Both units have touchscreen controls, chromotherapy (color light therapy), Bluetooth audio, and app integration. Sunlighten’s app is more polished. Sun Home’s is functional. Neither is critical to buying decision.

    Price

    Roughly: Sun Home is 15-30% cheaper for equivalent spec models. Sunlighten justifies premium on brand + warranty.


    Our picks by scenario

    Buyer note: Sun Home and Sunlighten sell primarily direct-to-consumer through their own websites. The Amazon links below surface Amazon inventory that may include third-party listings or comparable units – always verify you are buying from the actual brand storefront. For guaranteed authentic units, purchase direct from sunhomesaunas.com or sunlighten.com.

    Best 2-Person Premium Sauna (Value Pick)

    For most premium buyers, a 2-person full-spectrum Sun Home model in the $3,500-$5,000 range delivers 90% of the Sunlighten experience at 70% of the Sunlighten price. Best combination of spec and value at this tier.

    Check current price on Amazon →

    Best 2-Person Premium Sauna (Brand Pick)

    If brand pedigree matters to you, the Sunlighten Signature 2-person is the reference premium sauna. Longer heater warranty, more polished user experience, higher resale value. Costs more but you know exactly what you’re getting.

    Check current price on Amazon →

    Best 3-Person Full-Spectrum

    Three-person capacity full-spectrum saunas sit in the $3,000-$8,000 range. Sun Home offers the best value pick. Sunlighten offers the more established option. Both are excellent.

    Check current price on Amazon →

    Best Compact 1-Person Premium

    One-person premium infrared saunas are the sweet spot for apartments, small basements, or dedicated single-user setups. Sun Home Solo unit is the most-recommended pick at this size.

    Check current price on Amazon →

    Best Portable Alternative

    If you cannot commit to a ,000+ cabinet install (renter, small space, testing before buying), a Sun Home or comparable brand infrared sauna blanket delivers 80% of the benefits at 15% of the price. Not a permanent solution but a legitimate entry point.

    Check current price on Amazon →

    Best Accessories Bundle

    Chromotherapy panels, waterproof mats, backrest cushions, essential oil diffusers, cedar cleaning products. Sun Home offers packaged accessory bundles. Sunlighten sells individually. Bundles save money if you want the full package.

    Check current price on Amazon →


    What we did NOT include and why

    Clearlight: comparable to Sunlighten but distributed through wellness centers. Different sales model. Covered separately.

    Under $3,000 units: see our Best Home Infrared Saunas Under $3,000 guide.

    Traditional saunas from either brand: different product category. Sun Home and Sunlighten focus almost exclusively on infrared.


    The honest bottom line

    Both brands make excellent products. The Sun Home vs Sunlighten decision is almost always about your comfort with brand pedigree vs value.

    New buyers with budget flexibility: Sunlighten. Warranty confidence + established support ecosystem is worth the premium when you are learning what you actually want in a sauna.

    Return buyers or spec-focused buyers: Sun Home. If you already know what you want in an infrared sauna, Sun Home delivers it for less money.

    Either way: plan your electrical, ceiling height, and delivery day carefully. Both brands ship on pallets and require careful assembly.

  • Red Light Therapy Panels That Actually Work: 6 Picks Ranked by Real Irradiance

    Red Light Therapy Panels That Actually Work: 6 Picks Ranked by Real Irradiance

    Affiliate disclosure: As an Amazon Associate, Hot Cold Recovery earns from qualifying purchases. Product recommendations are our honest opinion based on published specs, warranty terms, and available user reports. Prices reflect Amazon US at time of publication and are subject to change. Full disclosure.

    Red light therapy went from clinic-only to home-market in 2020, and the past three years have been a mess of over-marketed panels making questionable health claims. Most sub-$200 Amazon panels are below typical therapeutic thresholds. Most $2,000+ panels are wildly overpriced for what they deliver. The useful buying zone is in between – and most buyers do not know how to find it.

    This guide covers what red light therapy panels actually do (per the peer-reviewed research), what specs matter, and which panels deliver useful therapeutic doses at real home prices.


    What red light therapy is actually good for

    The research supports red light therapy (RLT) – typically 630-670nm red plus 810-850nm near-infrared – for a few specific outcomes:

    • Skin – collagen production, wound healing, some acne. Best-supported use case.
    • Muscle recovery – modest improvement in soreness and recovery time after intense exercise.
    • Circadian rhythm – morning red light exposure can help reset sleep-wake cycles.
    • Joint pain – short-term relief for some inflammatory conditions.

    Claims that RLT causes fat loss, hair growth (beyond a small subset of male-pattern baldness cases), or thyroid modulation are much less well-supported.


    What specs actually matter

    • Wavelength – you want 630nm and 660nm red, 810nm and 850nm near-infrared. Panels that only emit one wavelength are limited-use.
    • Irradiance (mW/cm2) – this is the “power density” measured at a specific distance. 100 mW/cm2 at 6 inches is a useful therapeutic dose. Under 30 mW/cm2 is below typical therapeutic recommendations.
    • Coverage area – the physical size of the light-emitting area. Larger = fewer treatment positions needed.
    • EMF rating – most panels emit minor EMF from the drivers. Look for panels with 0 mG at 6 inches.
    • Third-party testing – reputable brands publish independent test data. Panels without published test data – avoid.

    Our picks: Red light therapy panels that deliver

    Best Full-Body Panel (Premium)

    Full-body panels are 4-5 feet tall and treat your whole body in one session. Look for panels with 300+ LED diodes at both 660nm and 850nm wavelengths. This tier delivers real therapeutic doses (100+ mW/cm2 at 6 inches).

    Check current price on Amazon →

    Best Mid-Size Panel (Torso Coverage)

    Mid-size panels cover your torso in one session, upper vs lower body separately. Good balance between price and coverage. Wall-mountable or on a stand. This is where most serious home users land.

    Check current price on Amazon →

    Best Compact / Face Panel

    Handheld or desk-mounted units for face and localized use. Best for someone whose primary interest is skin – collagen, acne, wound healing on a specific spot. Not enough coverage for whole-body recovery use.

    Check current price on Amazon →

    Best Red Light Mask (Skincare Focus)

    Wearable red light masks are the fastest-growing sub-category. If your goal is purely skin health rather than muscle recovery, a mask is a better fit than a panel. Look for masks with both 630nm and 830nm wavelengths.

    Check current price on Amazon →

    Best Combo (Red + Near-IR + Additional)

    Some newer panels add blue light (455nm for acne) or yellow light (590nm for skin tone) alongside the standard red and near-IR. Useful if you want a multi-modality skincare device without buying three separate units.

    Check current price on Amazon →

    Best Stand or Mount (Add-On)

    A good adjustable stand transforms a wall-mountable panel into a versatile daily tool. Most panels do not include stands. This is the accessory that determines whether you actually use the panel or leave it sitting in the corner.

    Check current price on Amazon →


    What we did NOT include and why

    < Amazon panels: most publish inflated irradiance numbers. Independent testing consistently shows real output 30-70% below marketing claims. We recommend spending a bit more for tested units.

    Salon-grade beds: ,000+ commercial units. Out of scope for home use.

    Red light + PBM helmets for hair growth: different product category. Coverage in a future article.


    The honest bottom line

    For most home users, a mid-size dual-wavelength panel in the – range is the pragmatic choice. Enough coverage to treat torso in reasonable time, real therapeutic irradiance, and price that matches actual documented benefits.

    If your primary use is skincare, a good red light mask at -400 delivers more per-dollar value than a panel.

    If you are recovering from serious training or chronic pain and can afford it, a full-body panel at $1,500-$2,500 saves time – you treat your entire body in 10 minutes instead of moving a smaller panel around for 40 minutes.


    Not medical advice: Hot Cold Recovery publishes educational content about home wellness gear. The information here is not a substitute for professional medical advice, diagnosis, or treatment. Always consult a qualified healthcare provider before starting any new wellness practice, especially if you have a cardiovascular condition, are pregnant, or take medication. Home wellness devices are not FDA-cleared to treat, cure, or prevent any specific disease.
  • Best Cold Plunge Tubs Under $2,000 in 2026: 6 Real Buying Picks

    Best Cold Plunge Tubs Under $2,000 in 2026: 6 Real Buying Picks

    Affiliate disclosure: As an Amazon Associate, Hot Cold Recovery earns from qualifying purchases. Product recommendations are our honest opinion based on published specs, warranty terms, and available user reports. Prices reflect Amazon US at time of publication and are subject to change. Full disclosure.

    Cold plunge tubs went from a niche recovery tool to a mainstream wellness product in 2024-2025, and 2026 is when the price war really started. You can now buy a functional home cold plunge for under $2,000 – which was unthinkable when Plunge, the market leader, launched at $5,000+.

    This guide covers the actual under-$2,000 options that work, what they compromise on to hit that price point, and what you get when you spend $1,500 versus $3,000+.


    What “cold plunge” actually means at each price tier

    Under $500 — inflatable tubs with no chiller. You add ice manually every session. High friction, low fun. Best for “just testing if you like cold” before spending real money.

    $500-$1,200 — insulated barrels or plastic tubs, still no chiller. Better insulation means ice lasts longer. Ice Barrel and similar sit here.

    $1,500-$2,500 — the sweet spot for entry-level chiller-equipped units. Turn on the chiller, water stays at 39-50F, no ice hauling. This is where most first-time real buyers land in 2026.

    $3,000-$8,000 — Plunge, BlueCube, Renu Therapy tier. Better chillers, better insulation, wooden aesthetics, faster cooldown times.


    What to check before you buy

    • Water temperature range — 39-55F is the useful range. Sub-39 gets dangerous. Above 55 gives limited benefit.
    • Chiller wattage vs recovery time — a 1/3 HP chiller takes 2-4 hours to bring warm water back to plunge temp. 1 HP does it in 45-60 minutes.
    • Filter type — 20-micron sediment filter is basic. UV sanitization is a nice-to-have. Ozone is best.
    • Insulation R-value — the difference between water staying cold overnight vs your chiller running constantly.
    • Warranty on the chiller — this is the part that fails. 2-year chiller warranty is the minimum you should accept.
    • Winter freeze protection — if you plan outdoor install in Canada or northern US, verify the chiller has a freeze-protection cycle.

    Our picks: Cold plunges under $2,000

    Best Under $1,000 – No Chiller (Ice Barrel Style)

    The Ice Barrel is the well-known name here at ~$1,200 but the pattern is: insulated barrel, cover, drain plug. You add ice. If you commit to the ice-hauling routine, this is the cheapest path to a real plunge experience.

    Check current price on Amazon →

    Best Under $1,500 – Entry Chiller Setup

    The first tier where the chiller does the work. Compact stainless or insulated plastic tub with a 1/3 HP chiller. Slower cooldown but zero ice hauling. Perfect for indoor basement install.

    Check current price on Amazon →

    Best Under $2,000 – Full-Featured Chiller Unit

    Larger tub (fits a 6-foot adult with knees bent), 1/2 HP chiller (60-90 min recovery), better filtration, ozone sanitization. This is where you start getting the ‘real Plunge experience’ at half the Plunge price.

    Check current price on Amazon →

    Best Portable / Foldable Option

    Foldable inflatable tubs at -500 are legit for testing the concept. Ice hauling required. Storage-friendly for apartments or renters. Not a long-term daily solution but a solid on-ramp.

    Check current price on Amazon →

    Best Budget Chiller (Standalone)

    If you already have a tub or want to convert a stock tank, standalone water chillers in the 1/3 to 1/2 HP range are -1,200. Retrofit approach. Cheaper than integrated units but requires plumbing.

    Check current price on Amazon →

    Best Cover for Any Plunge

    A good insulated cover cuts your chiller runtime in half and keeps debris out. The most-underrated accessory in cold plunge. Should be your first add-on regardless of which tub you buy.

    Check current price on Amazon →


    What we did NOT include and why

    Plunge, BlueCube, Renu Therapy: excellent products but all ,000+. Covered in our premium buying guide (coming soon).

    Outdoor stock tanks + chiller hacks: the DIY approach works but is not what most buyers want. If that appeals, see our DIY cold plunge conversion guide (coming soon).


    The honest bottom line

    For most first-time buyers, an entry-tier chiller-equipped tub in the $1,500-$1,800 range is the pragmatic choice. Better than manual ice, cheaper than the premium tier, and you actually use it every day when the chiller does the work.

    If you are budget-capped at -800, the Ice Barrel or similar is a legitimate on-ramp. Plan the ice-hauling routine before you buy – most people abandon it within 3-4 weeks.

    Whatever you buy, get the insulated cover and plan the electrical. A chiller draws 450-800W continuous during recovery – budget for the outlet and the electric bill.

  • Best Home Infrared Saunas Under $3,000 in 2026: 6 Real Buying Picks

    Best Home Infrared Saunas Under $3,000 in 2026: 6 Real Buying Picks

    Affiliate disclosure: As an Amazon Associate, Hot Cold Recovery earns from qualifying purchases. Product recommendations are our honest opinion based on published specs, warranty terms, and available user reports. Prices reflect Amazon US at time of publication and are subject to change. Full disclosure.

    If you are shopping for a home infrared sauna under $3,000, you have more options in 2026 than ever before — and more marketing noise to cut through. Full-spectrum, near-infrared, mid-infrared, far-infrared, EMF ratings, “clinical grade” claims, wooden species, control panels… it adds up to real analysis fatigue when you are trying to make a $2,000-$3,000 buying decision.

    This guide is written for the buyer who wants a working, well-built infrared sauna installed at home, under the $3,000 ceiling, without wading through 90-page owner forums. We compare the six units that actually show up in real 2026 shopping baskets — the ones with documented specs, real warranties, and reviews from more than the manufacturer’s own marketing team.


    Quick answer: what to buy at each price point

    Under $1,500 — cheap-tier infrared units mostly fail on EMF or warranty. Wait until you can spend more.

    $1,500 to $2,500 — the sweet spot. Real wood, real warranties, low EMF ratings from independent testing. Two-person units start here.

    $2,500 to $3,000 — three-person capacity, full-spectrum options, better control panels. This is where “premium value” sits.

    Above $3,000 — you enter established-brand territory (Sunlighten, Clearlight). See our separate premium buying guide.


    What to actually check before you buy

    • EMF rating (independently tested): under 3 milligauss is the safe threshold. Any brand refusing to publish independent EMF test data — walk away.
    • Wood type: Canadian hemlock or Western red cedar is the gold standard. Avoid Chinese white spruce (has less consistent quality control).
    • Heater count and placement: more heaters mean more even heat distribution. Six-heater setups (back, side, front, floor) run circles around three-heater setups at similar power draw.
    • Warranty: 5-year heater warranty is table stakes. Lifetime frame warranties are becoming standard on units over $2,000.
    • Assembly: most units are two-adult, 60-90 minute assembly. Some claim “no tools required” — verify by looking at real customer photos, not manufacturer videos.
    • Ceiling clearance: most one-person units are 6'5″ tall. Verify your basement or spare room can accommodate.
    • Electrical: most under-$3,000 units run on standard 120V household circuits. Larger three-person units may need a dedicated 20-amp circuit.

    Our picks: 6 home infrared saunas under $3,000

    Best 1-Person Under $2,000

    Compact, low-EMF, hemlock wood, standard 120V. Best fit for a spare room or basement corner where you want a real daily sauna practice without eating a ,000+ budget. Warranty and reviews are the strongest at this tier.

    Check current price on Amazon →

    Best 2-Person Under $2,500

    Two-person units at this price point are the sweet spot for couples or families that want to share sessions. Six heaters is the minimum you should accept at this level. Full-spectrum is available but not necessary for most buyers.

    Check current price on Amazon →

    Best 3-Person Under $3,000

    Three-person capacity is the largest that fits in a standard home basement without a dedicated 240V circuit. Look for units with corner design if space is tight. This tier is where you start seeing chromotherapy lighting and Bluetooth audio as standard.

    Check current price on Amazon →

    Best Full-Spectrum Option Under $3,000

    Full-spectrum saunas add near-infrared to the standard far-infrared. Near-infrared is what the wellness research is currently focused on. Under $3,000 the options are limited but real – look for units that publish the specific near-infrared wavelengths their heaters emit (830nm and 850nm are the two commonly cited).

    Check current price on Amazon →

    Best Portable/Blanket Alternative

    If you cannot commit to a fixed wooden cabinet – renter, small apartment, testing before you commit – a portable infrared blanket or tent is a legitimate entry point. Not as effective as a real sauna cabin but 90% of the benefits at 15% of the price and no install.

    Check current price on Amazon →

    Budget Beginner Option Under $1,500

    If your budget is truly capped at ,500, look at 1-person portable box saunas rather than compromised full cabinets. The build quality at this price on cabinets is not worth the money – portable box units at least deliver what they promise.

    Check current price on Amazon →


    What we did NOT include and why

    Sunlighten and Clearlight: excellent brands, but their entry-level units start at ,500+. Covered in our premium buying guide.

    Traditional saunas: different product entirely. If you want a traditional dry sauna experience (Finnish-style, higher heat, lower humidity), see our Traditional Saunas category.

    Steam rooms and infrared crossovers: most “steam + infrared combo” units under $3,000 do neither well. Pick one modality.


    The honest bottom line

    For most buyers new to home saunas, a 2-person hemlock infrared sauna in the $1,800-$2,400 range is the pragmatic choice. It fits real spaces, delivers real sessions, and does not blow the budget. If you have space and want three-person capacity, add another -600. If you specifically want the near-infrared research angle, stretch to full-spectrum.

    Whatever you buy, plan your delivery day carefully. Most infrared saunas ship in 4-8 large boxes on a pallet. You need a friend, a dolly, and about 90 minutes of assembly time.


    Related reading

    • Best Cold Plunge Tubs Under $2,000
    • Coming soon: Red Light Therapy Panels That Actually Work
    • Coming soon: The Recovery Stack — Sauna + Cold + Red Light Routine